Service Manager powered by HEAT
Creating a Change Request
Change requests are divided into five different types. Each type of change request defines three things:
•The priority of the change in relation to other changes.
•The speed at which the change must be implemented.
•The size of the impact that the change makes on the organization.
Follow these steps to create a change request:
1.Do one of the following:
•Log in to the Service Desk Console and open the Change workspace.
•Within a form (such as incident, problem, or release), select the Change tab.
2.From the toolbar, click New Change to open a blank form, or choose a template from the drop-down list.
New Change Record
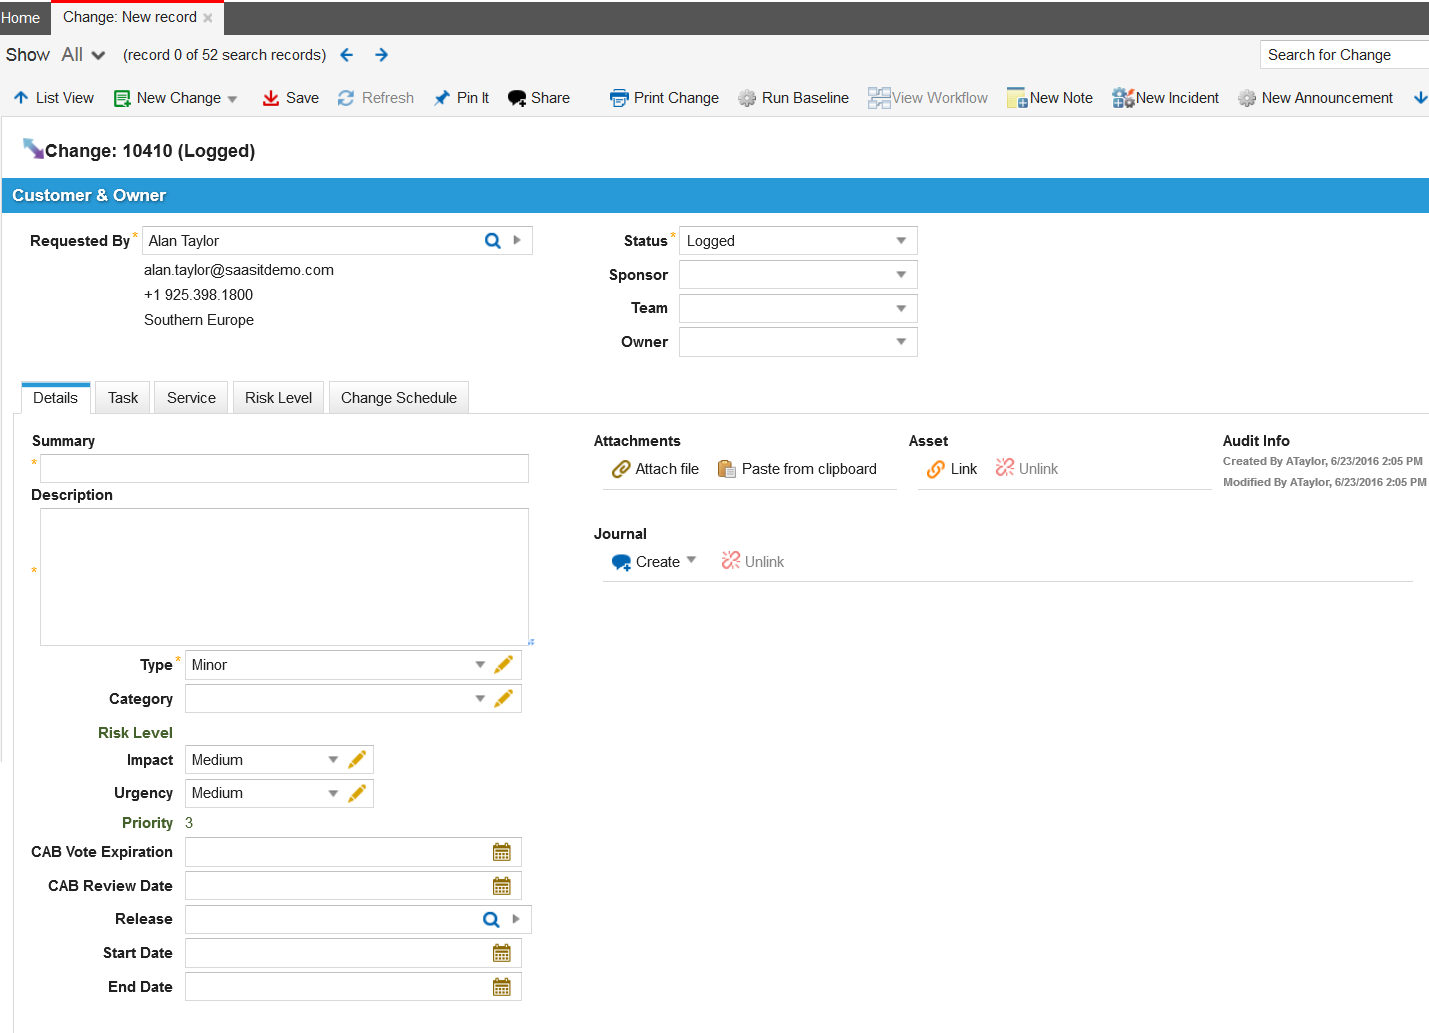
The system displays a change form. If you used a template, some data already appears in the fields.
If you create a change request as a Service Desk Analyst or another user who does not have Change Manager permissions, the system only displays a subset of fields on the change form.
The system sets the change request status to logged.
The system displays the following default tabs (results may vary depending on your system setup):
•Details: Continue to the next step.
•Task: See Working with Tasks.
•Approvals: Appears only if an approval is needed for a task on the change request. See About Overriding Approvals .
•Approval Vote Tracking: Appears if an approval vote is being tracked.
•Attachment: To attach a file or URL, see Working With Attachments and URLs.
•Activity History: See About Activity History.
•CI: To create or link a configuration item, see About Creating a Configuration Item.
•Service: To create or link a service, see Working with Services.
•Incident: To create or link an incident, see Viewing an Incident.
•Problem: To create or link a problem, see Working with Problems.
•Baseline: See About the Configuration Baseline.
•Related Posts: See About the Related Posts Tab.
•Risk Level: See Setting the Risk Level for a Change.
•Change Schedule: See Scheduling a Change Request.
•Cost Item: See Working with Cost Items.
•Problem Related Incidents:
•Announcement: See Working with Announcements and FAQs.
•Workflow Instance: See Working with Workflow Instances.
•Audit History
3.Enter information into the fields under the Details tab.
| Field | Description |
|---|---|
|
Requested By |
The person requesting the change. The system automatically enters the name of the logged-in user, but you can change this if you are not the requester of the change. |
| Sponsor | Optional. The name of the sponsor of this change. |
| Team | The team associated with the person requesting the change. Choose from the drop-down list. |
| Coordinator | The coordinator requesting the change. Choose from the drop-down list. Defined from the team list. |
| CAB Vote Expiration | The deadline date and time for the Change Approval Board (CAB) to vote to approve or deny this change. The date and time must be after now. |
| CAB Review Date | The deadline date and time for the CAB to review this change. The date and time must be after now. |
| Approved By/On | This field is automatically populated by the system, based on the approval workflow. |
| Cost | This field is automatically populated by the system. |
| Time | The time spent is based on the activity history, is automatically generated by the system, and is given in minutes. |
|
Summary |
Subject or title of the change. |
|
Description |
Details of the change. |
| Status |
The status of the change. Choose from the drop-down list. Only Change Managers can modify a change status. See Change Business Object Reference for details on each change status. |
|
The type of change: Standard: This type of change is performed on a regular basis and is considered routine. Standard changes are typically created through one of the various change templates available. A user cannot create a standard change in the same fashion as other changes. Emergency: This type of change is usually a response to a failure or error that needs an urgent fix. Emergency changes must be made quickly and is usually recorded after the change has already been made. Major: This type of change requires a lot of items or dependencies and may require other associated change requests. Minor: Small changes or changes that have a small or minor affect are classified this way. Significant: Similar to major except that significant changes might need to be divided into several partial subsequent changes that together would constitute a large significant change, depending on the policies and requirements of your organization. |
|
| Category | The category of the change. Choose from the drop-down list. |
| Justification |
The reason for the change. Choose from the drop-down list. |
| Risk Level | Automatically shows the results of the Risk Level tab. |
|
Urgency |
The time appropriateness required. The default value is 3. Urgency and impact together define the priority value. High: Necessary immediately with a high degree of urgency. Medium: Required, but can be made after higher urgency changes have been implemented. Low: Required, but can wait for other changes of greater urgency to be implemented. |
|
Impact |
Impact to the organization, group, or individual. The default value is 3. Impact and urgency together define the priority value. High: Has a major impact on the organization. Medium: Has some effect on the organization but generally not considered a large effect. Low: Does not have much effect on the organization. |
|
Backout Plan Attached |
Specifies that there is a backout plan to the record under the Attachment tab. Attach the required supporting documents before setting the change to pending review status. |
| Changes Tested | Specifies if you have tested the changes described in this record. |
| Start Date | The date and time when the event starts. |
| End Date | The date and time when the event finishes. |
| Release | Optional. The related release number. The release must be defined in the Release workspace. |
4.Click Save.
The change request remains in the logged state while you are working on the change request record.
Linking a Business Object to a Change Request
From the change request, you can link to an incident, problem, configuration item, service, or release that gets resolved from the change request. Change requests created from within an object are automatically linked.
•Incidents: Incidents, not problems, should be created for any issues that arise during the change process. Problems arise from the underlying root cause of one or more incidents or potential incidents; for this reason, you cannot create a new problem from a change request. You can, however, view incidents that are linked to a problem from a change record.
•Problems: An existing problem can get resolved when a change is implemented, so you can link an existing problem record to a change. All configuration items and services linked to the problem record get linked to the change by a default Search and Link business rule.
•Releases: When the change request is linked to a release, link the problem record from the change request to the release record. A change request is usually scheduled to implement or deploy a configuration item through the release mechanism. In Ivanti Service Manager, configuration items include physical assets as well as services. During the change, the Change Manager needs to ask which configuration items have been affected, how have they been affected, and which services are impacted by the affected configuration items. For example, implementing a new Microsoft Exchange server (a configuration item) could potentially impact email services (a service).
•Configuration Item: The Change Manager can view the CI map to view the services that might be impacted by or impact the change.
•Baseline: The Change Manager can view the baseline of a configuration item before making the change. The system records a baseline of the associated configuration item in the Baseline Comparison tab of the configuration item record and in the Baseline tab of the change record when the change is in implemented status.
•Services: Impacted services that are linked to the change need to be linked to the Service tab of the release record when the change is linked to a release. See Linking Configuration Items and Services to a Release.
A Validation on Save business rule that the problem cannot be set to resolved or closed unless associated change records are set to implemented, closed, canceled, denied, or deferred is disabled by default. Your administrator can enable this rule for the business object, if needed.
To link a change request to a business object, do the following:
1.Log in to the Service Desk Console.
2.Open the Change workspace.
3.Open the change record to link.
4.Within the change request, click the business object tab (incident, problem, or release). The system displays a list of links, if any.
5.Click Link from the toolbar. The system displays a list of business object records.
6.Select a record, then click Select. The system adds the record to the list and links it to the change.
7.Click Save.
Was this article useful?
The topic was:
Inaccurate
Incomplete
Not what I expected
Other
Copyright © 2017, Ivanti. All rights reserved.